


– Today, I wanna share with you guys really easy methods and techniques of using your flat iron to create different curls and waves. Very easy. I wanted to keep it more of like a guide where I show you different various techniques of how you twist, of how you wrap, of how you press, of how you bend your flat iron. Hopefully, hopefully this will shed some light if you have any questions, concerns, or you just can’t get that certain style down.
Hopefully I can help you.
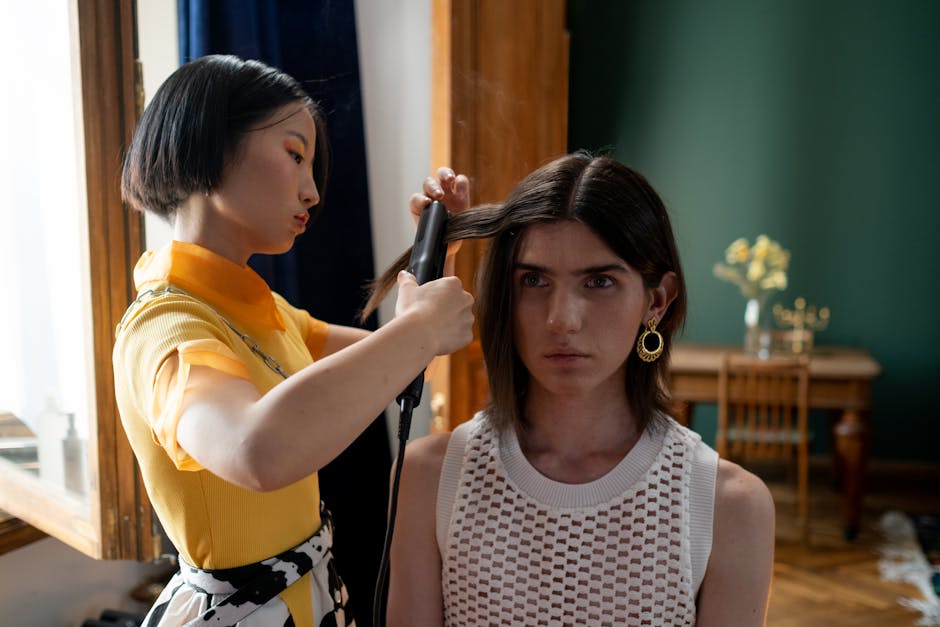
Let’s begin. So the first method or technique is how you twist your flat iron. And this is either away from your face or towards your face just because it gives you completely different styles. Let me show you. So this right here is when you take your hair and you curl it away from your face.
This, I feel like it kind of opens up your face ’cause you have that hair and it’s swooping away, kind of like when you’re walking into the wind, you know what I mean? And now let me show you what it looks like when you’re curling it towards your face. So you take your hair and instead of away, you do it towards your face. As you can see, the waves, they’re completely a different look. The one that’s going away from your face, it’s a little bit more soft, it’s a little bit more feminine, and it’s a little more modern take on that wave versus the one that’s going towards your face.
This Is giving a very old Hollywood-esque, because you’re kind of, it’s curving towards your face and it’s kind of hiding your face in a way.
The next thing, when you do these kind of waves towards or away from your face, you can also alternate them. That’s what I like to do as well, many times. So the very first sections that are towards my face, I like to go away just because I feel like it opens up my face a little bit more, and the way it moves, it just moves very naturally, and then the next section: go towards my face and it kind of plays with the technique a little bit. Let me show you.
Because this one is away from my face, this next section I’m gonna do towards my face. Same thing, twist it towards first and then down. You can see it right there. Just kind of plays with each other. And this one, we’re gonna go away.
And again, I think it gives a completely different look, but still similar enough. It all depends on which way you wanna twist the flat iron, towards or away.
That’s a personal preference in my opinion. So play around with it. See what you think, see what you like, even for your face shape, for your hair needs, for your hair wants, and I think you’ll find that perfect method for yourself.
Let’s move on to the next technique or the next method I think you should pay attention to. The next technique and method is how you hold your flat iron, because when you hold it in a different way, it can have different results.
So the very first one, you just saw how I do it, is you hold it vertically, but at an angle, and this one, I think results with really elongated curls depending how much you pull on the hair. So let me quickly show you. You take your flat iron, put your hair through the plates, you give it a twist, depending how many twists you wanna do, just do a 180, and then you gently pull it down at an angle.
Just like so. The next way is when you hold it horizontally and then pull it down. So exact same thing. You take the hair, you pull it through the plates, you give it a good twist but you hold it horizontally and down.
This right here gives more of a body and a bounce depending how thick of a section you grab, how high your heat is, but you can see the hair is a lot more, it’s a lot shorter, it’s a little bit more bouncy, it’s not as long, and it’s a very different style that you can go for.
– And the next way you can hold your flat iron, so many people do this because it’s quite easy, you hold up. Instead of down at an angle, you just hold it straight up. You do it, take the hair through the plates just like this, you give it a twist, and then you just basically pull it through the hair very gently.
So this method and technique I would say is the closest to a curling iron method, just because you’re holding the plates up instead of down at an angle. Very easy to use, very comfortable.
That way, you don’t have to do too much twisting, and you’re literally mimicking a curling iron except you have the two plates. The next method/technique is the wrap. There’s no twisting involved. All you do is just wrap your hair around the flat iron and you slide it down. Let me show you.
You take a section of hair, take your flat iron. You keep your plates open. You take your hair and your wrap it around, slide it through the plates, clamp it, and just very gently slide down.
Just like that. – Wow.
– Very easy. I feel like this is the easiest technique, but again, you have to implement Are you going to wrap it around or away on your flat iron? So see, this one is going away from my face because I wrapped it away. This one is gonna go towards my face. Let me quickly show you.
You take your hair, and instead of wrapping it away, we’re gonna wrap it going around and through. Let go, clamp, and slide. And it’s going towards my face. So you see this, it’s wrapping it and then through. So you see most of that wave is towards the bottom of the hair.
If you have very long hair I would suggest this method, just because it’s easy.
There’s no twisting involved. You wrap, you press, and you slide down. and again, you can hold your flat iron horizontally, at an angle, you can, again, play around with the first method and techniques that I talked about in the beginning. I feel like those are so important of how you’re holding your tool just to really see what you prefer from your hairstyles.
The next method and technique is called the bend. This is where you literally take your flat iron and you bend it up, down, up, down, or you can alternate it down, up, down, up, down, up. The same as the very first technique, it all depends how you wanna start off your curl or wave. So this right here I would say is the S method. It’s definitely easy once you get the hang of it, but with this one, I would say requires quite a bit of like trial and error and seeing how you like it.
So starting off with a section of hair, I usually get a little bit more of a wider section, and what you do is you take your flat iron, you’re gonna keep it horizontally, and what you do is you kinda start bending it down, and then you flip it back up, and then you take it down again. Just like that. You see how it gives that nice little wave? And on this side, I’ll show you how I go up instead of down. So first you begin up and then go down.

Up, down. And then you finish it off. So you can see it’s a little bit different but similar enough, you know what I mean? So this one I also like to alternate, At the very top, I’ll start up and then I’ll go down, but then I’ll start alternating midway just to kinda give a different dimension, a different look to the waves so they’re not all unison. A little bit different, because natural waves, they don’t all go in the same direction.
They’re kind of, you know, do their own thing on your head. So I do appreciate this one ’cause it looks like you didn’t try so hard, but you do have a little bit of a bend happening here and there, and it’s quite easy.
And like I said, you can also play with your angle of the flat iron, so taking it a little bit at an angle like this. Gives a very different look. Once you figure out the method that you prefer with this bend technique, it’s really easy and it takes not even a couple minutes to do your full head, ’cause the thing is you don’t have to be very precise with it.
Just go for it and you’re done. The next method is called the pressing method. This is literally where you take the flat iron and you press it over a certain pattern that you are creating, Again, this is very easy, but it is the most time-consuming. This is the most creative, the most imaginative, because you can do your hair around any kind of object, and then you take a hot flat iron and then you press it to create that style. People were going crazy.
Wrapping it around pencils, chopsticks, whatever you could possibly find to wrap your hair around it and then take your flat iron and press it over to get that heat through, or you can do like the pinup curls. You can do like those little bends and you can press it. So for example, you can take a section of hair, and you kind of bend it down, you take your flat iron, and you press it a couple of times over this area.
Just like that. And then you take this part and you kind of place it up, and again, you just basically following that curvature by pressing, And see, it gives a very slight wave, but I feel like this one is the hardest because then you can get pins involved, but it’s just like you can do so much.
The next thing, you can just take a section of hair and you literally wrap it around chopsticks. Literally, I’m not even kidding. And just wrap it. Hold it there at the very end. You take your flat iron and you press.
You hold for a couple of seconds and then you move it down that section of hair, and just kind of move it back and forth until it heats through. You kinda let it cool off. It’s still hot. You let it cool off, and then you reveal your creation. See that?
And this is why I’m saying this takes a lot of effort, a lot of creativity, a lot of time, because you’ll be doing a lot of hair. I would say this is very artistic.
This is very, what’s the word I’m looking for? – Avant-garde? – Very avant-garde, yes.
But it’s just, I feel like this one you can have so much fun with, try it different ways. The next one, let’s do the pin curl where you have little pins ready. You take a section of hair and you wrap it around your two fingers. Again, you can wrap it whichever way you prefer, but keep it kind of nice and tight.
And then you slide it off the fingers, kind of from underneath, but still holding it just like so.
And then take the hair. You gently clamp it like sideways and you hold it in there. And this one, you actually just press and you hold for maybe five to 10 seconds depending on how thick your hair is, how much heat it needs, how high your heat is on your flat iron. I’m just kind of moving it around. My layers are getting out.
And then instead of letting go, you basically wrap it back up while it’s still hot and hold it with the pin and let it set. Another great pressing method is you take a section of hair, you do a three strand braid, and you can do small little sections, you can do big sections, like big braids. And take your flat iron and you press it down. And you just move it down the section of hair, and again, depending on how thick your braid is, how wide, how thick, you might wanna hold it for a little bit longer, but always just kinda keep it moving in a way.
– And you can also, of course, take these sections and spread them out before you clamp, that way you get bigger sections.
But again, this is all about your technique, your method. Do you want really thick, bigger waves, really tight, little curls, little crimping looking technique? But again, this is gonna take quite a bit of time, but it’s fun. (chuckles) You can get really creative here. Instead of sleeping all night long in braids, you just braid it, you clamp it, you press, and then you undo it.
It’s not the best method that I would prefer to use a flat iron, but this is fun. It’s the most time-consuming, but you can get very creative. Let’s see what this one looks like. – [Andrey] That’s just a big wave. – Just a nice big wave.
This is, I think, more about having fun with it, you know what I mean? Getting your creative side, your artistic side out and just having fun with your hair, or do it on somebody else if you really wanna explore different techniques, different options.
– [Andrey] You can have a flat iron party. – Flat iron party. Just be careful.
Don’t burn any hair off. Another way you can do this is you can do it horizontally and then you go down and then wrap it back up into your fingers and then you clamp it out of the way. That way this will ensure that the that the curl is nice and set it’s a little more consistent it’s more uniform and I personally prefer it like I mentioned. I hope this shed a little bit more light on how to use a flat iron, ’cause there’s so many different techniques and different methods, but I feel like once you get those first several methods and techniques down, you’ll know exactly what you wanna do, you’ll get very proficient at it, and then you won’t even really have to think about it and you’ll just do whatever.
You’ll wrap, you’ll twist, you bend, you press, whatever your heart desires, but I feel like this is a good little guideline of what you can do and what if maybe you’re doing something and you’re not getting the result, maybe you’ll understand why you’re getting those results and why you should be doing something else to get the other result that you’re trying to get but you don’t know how to get there.
If you guys are gonna have fun with this and try new methods and techniques, please share your photos with us and videos, your befores and afters. I think especially seeing people doing it around chopsticks, pencils, whatever you can think of, kitchen utensils. I did a parody on that. That was hilarious. But yeah, I think it’s just so much fun and you can get really creative, All right, you guys, please let me know what your favorite method is and what makes it easier for you.
But for now, you guys, thank you for watching and spending time with me and these flat iron methods and techniques, and I’ll see you in the next one very soon. Bye.
Read More: Babyliss Diamond Flat Irons – For Lovely Hairstyles
